How it's made: DIY gift box
Za današnji post, predstavljam vam DIY kutijicu za poklone, koja se napravi za deset minuta, a koja je jako slatka i možete da je ukrašavate kako želite i da joj date lični pečat. I možete da je pravite u svim veličinama.
Pretežno je sve objašnjeno na slikama, nadam se da će vam biti jasno kako se pravi, ako ne slobodno pitajte u komentarima :)
I hope you enjoyed your weekend and that you had a good rest.
For today's post, I present to you a DIY gift box, which can make for ten minutes, and which is very cute and that you can decorate as you like and give her a personal touch. And you can make it in any size.
Mostly everything is explained in the pictures, I hope it will be clear that the real,how it is made, if not, feel free to ask in the comments :)


 |
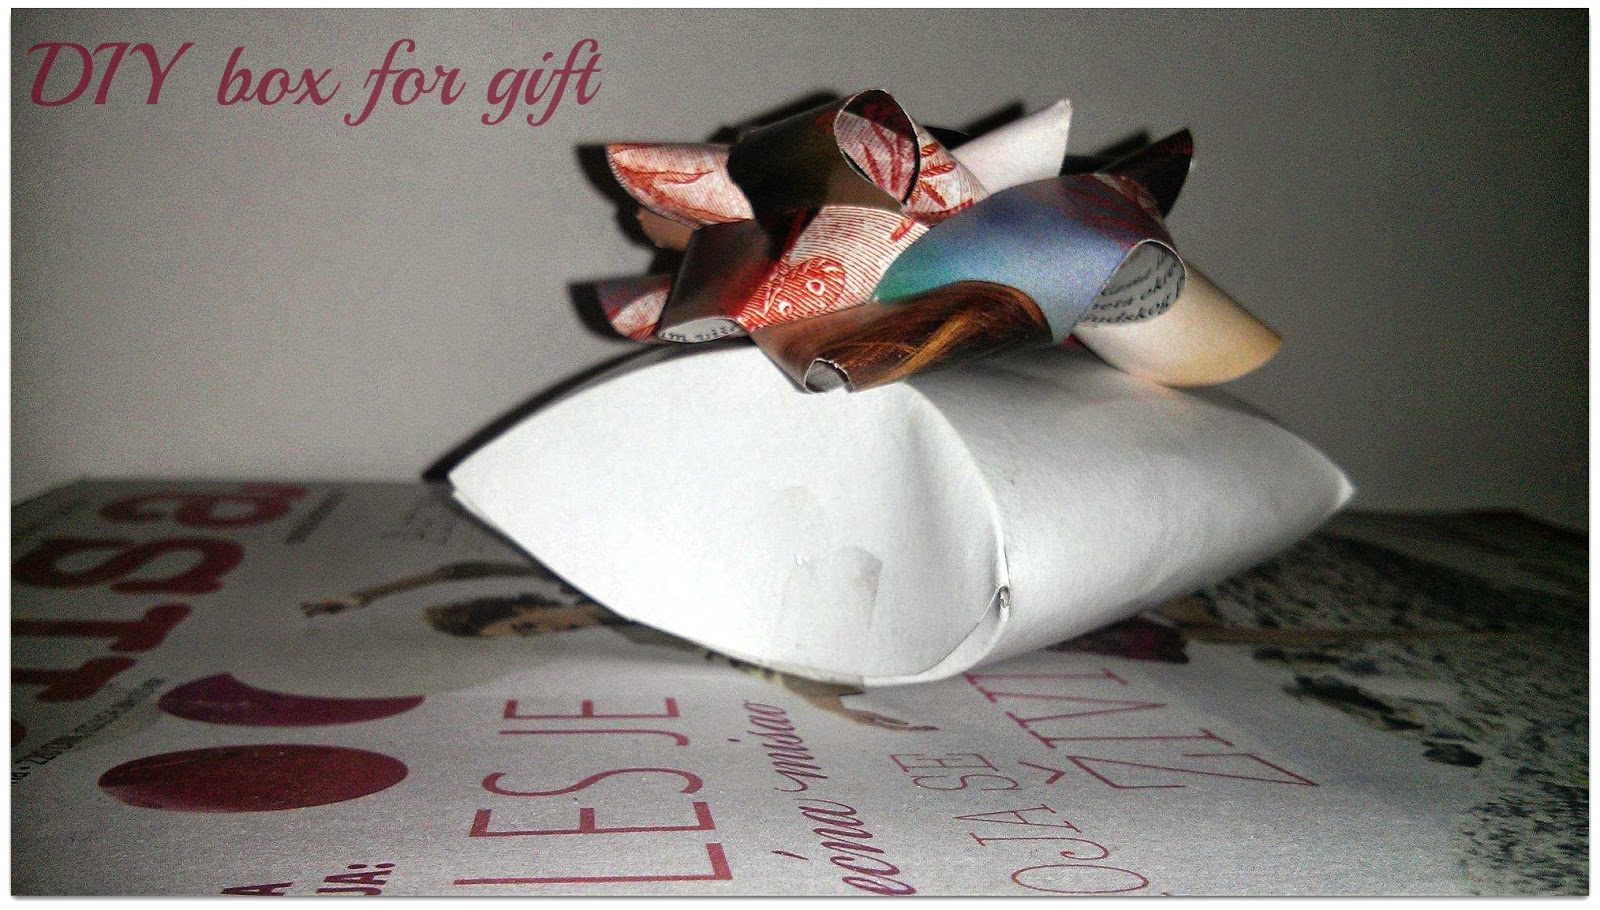
| Ovako izgleda na kraju. This is how it looks at the end. |
 |
| Isti postupak je i sa drugim krugom. The same process is for second circle. |

 |
| Isecite krugove po krajevima, i gledajte da budete sto precizniji jer su ivice vidljive. Cut the circles at the ends, and look to be as accurate as possible, because the edges are visible. |
 |
| Uzmite neki predmet sa kojim možete jako da prelazite preko ivica koje ste crtali, a da ih ne posečete. Take an object with which you strongly can hover over the edge that you drew, and not to cut the paper. |


Do sledećeg posta, ljubim vas :*
I debated with myself whether to color around on the box, whether to tie a bow or just paint. However, I decided to make this bow of the newspaper, and in the next post I will show you the process. It is very easy to make and looks great :)
Until the next post, kisses :*
.jpg)


I am a blogger from Slovakia and i love your style !!
ReplyDeleteU have a really nice blog !!
SSLEEK
Thanks :*
DeleteJoj ja bih ovo uspela da napravim iz jedno 197og puta, neki ljudi nemaju talenta..:( ahha :)
ReplyDeleteA slatko je baš! Već je vidim u roze boji sa nekim tufnicama ahhhh
Ma kakvi, iz prvog, veruj mi :) Probaj :)
DeleteSuper ideja!
ReplyDeleteSonia Verardo
http://www.trenchcollection.com/